Webduino Smart
Webduino Smart is a ground-breaking development board. Unlike Webduino Mark 1 and Webduino Fly, which need to combine with Arduino boards, Webduino Smart can function with the Internet and WebSocket independently. It will be a path to lead an efficient and effective development of IoT.
Price
Please send inquiries by email service@webduino.io or call +886-7-3388511.
Product Details
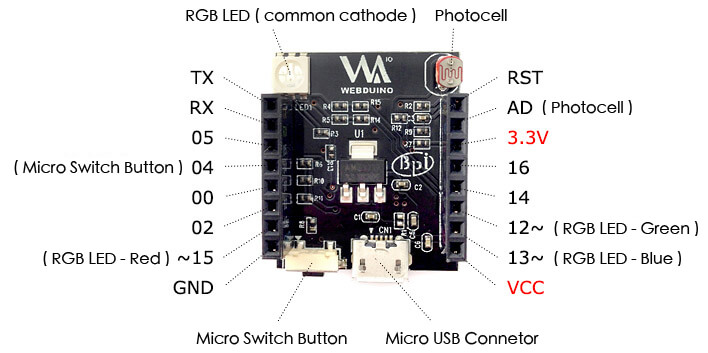
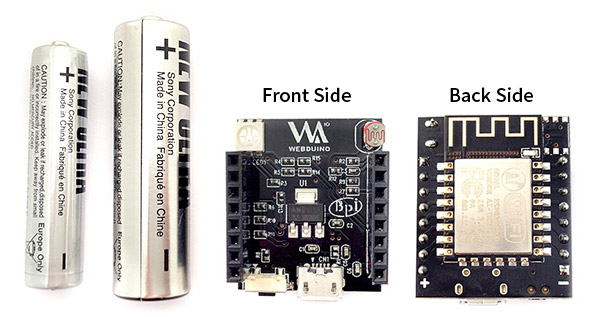
Board dimensions: 3cm in length, 2.5cm in width, 1.3cm in height, and a weight of 85 grams. Digital pins: 0, 2, 4, 5, 14, and 16. PWM pins: 12, 13, 15. Analog Pin: AD (A0). Other pins: TX, RX, 3.3V, VCC, RST, and GRD.
On-board Components and Pins
Before you use
The most important thing before you begin using the Webduino is setting up the Wi-Fi. The main purpose of the setup is to enable Webduino Smart to connect to the Internet or WebSocket. Using the setup, you can define the board's name and password, and update it through the Internet.
1. Webduino Smart Wi-Fi Setup: https://webduino.io/tutorials/smart-02-setup.html
2. Introduction to Webduino Smart: https://webduino.io/tutorials/smart-01-information.html
Size Comparison (Webduino Smart v.s. AAA/AA batteries)
360 degree overview:
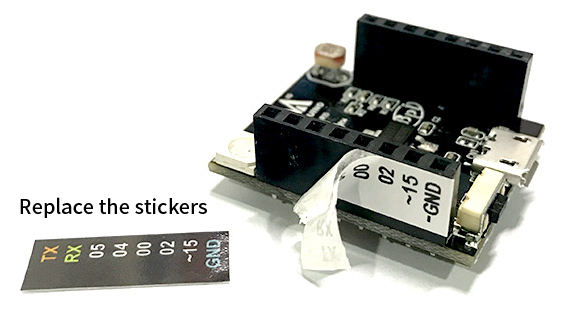
Replace the stickers
You can replace the original stickers on the board. Just cut the stickers that included in the package, and paste it on both sides. Please note that there are 4 stickers, L-out(outside on the left), L-in(inside on the left), R-out(outside on the right), and R-in(inside on the right) each.
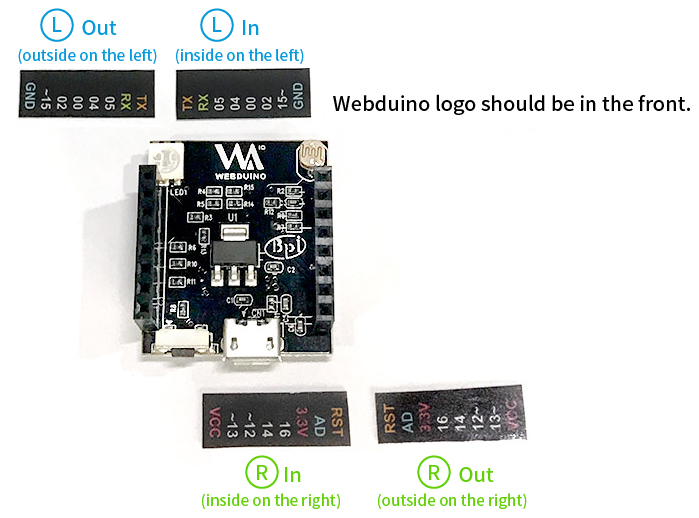
You could refer to the 360 degree overview for pasting them correctly.